Easy Nail Art Designs for Beginners

Striking a Balance
Stripes and French tips, a seemingly simple combination, can actually offer a surprising array of stylistic possibilities, from effortlessly chic to playfully daring. The key lies in understanding how to harmonize these two distinct elements. Careful consideration of the stripe's width, color, and placement alongside the French tip's subtle elegance will determine the overall aesthetic appeal.
Choosing the right stripe pattern is crucial. Thin stripes, for example, can create a more refined look, while bolder stripes can add a touch of vibrancy and personality. The color of the stripes should complement the overall color palette of the outfit, adding an extra layer of coordinated style.
The Timeless Appeal of French Tips
French tips, with their classic and universally flattering design, have long been a favorite among nail enthusiasts. Their clean lines and subtle sophistication offer a timeless elegance that transcends fleeting trends. They are a versatile choice, easily adaptable to various styles and occasions, from a casual daytime look to a more formal evening ensemble.
French tips are a reliable choice for those seeking a sophisticated yet understated look. This design's enduring popularity is testament to its ability to enhance any manicure without overpowering it.
Color Coordination for Maximum Impact
A well-coordinated color scheme is essential for achieving a harmonious effect when combining stripes and French tips. The colors chosen for the stripes should complement the shade of the French tips, creating a cohesive and visually appealing aesthetic. The ideal pairing depends on the desired outcome – a bold statement or a subtle touch of elegance.
Consider the overall color palette of your outfit. Stripes and French tips should enhance, not clash with, your ensemble. Matching the color scheme will create a well-rounded and stylish look.
Stripe Width and Placement: A Subtle Art
The width of the stripes plays a significant role in shaping the overall impression. Thin stripes exude a sense of refinement, whereas wider stripes can add a touch of boldness. The placement of the stripes on the nail also influences the visual impact. Strategically positioning the stripes against the French tip can create a visually interesting contrast.
Careful consideration of these elements is key to achieving a balanced and visually appealing effect. Paying attention to these subtle details will elevate the look from basic to sophisticated.
Texture and Finish: Adding Dimension
The texture and finish of the nail polish used for both the stripes and French tips contribute to the overall aesthetic. Experimenting with different finishes, like a glossy or matte finish, can add a unique dimension to the manicure. A subtle shimmer or a matte finish can add a touch of sophistication or a playful touch, respectively.
Versatility and Style: From Day to Night
The combination of stripes and French tips offers a surprising degree of versatility, adapting seamlessly to various styles and occasions. A subtle, understated look is easily achievable with thin stripes and a neutral French tip. For a more vibrant and playful look, bolder stripes and more vibrant colors can be incorporated.
Stripes and French tips can be dressed up or down with ease. This combination is a testament to the power of simple elegance, effortlessly transitioning between casual daytime outings and more formal evening events.
Dotting Tools: Simple Patterns with Big Impact
Dotting Tools for Nail Art
Dotting tools, often small, specialized applicators, are essential for creating precise and intricate nail art designs. They come in various shapes and sizes, from fine-tipped tools for tiny dots to broader ones for larger patterns. Choosing the right tool depends on the specific design you envision. Experimenting with different tools allows you to discover the ideal one for your skill level and desired effect.
These tools are incredibly versatile. Beyond creating dots, they can also be used to create delicate lines, outlines for shapes, and even intricate patterns by using multiple colors of nail polish. Mastering the use of dotting tools opens up a world of possibilities for nail art design, allowing you to create unique and personalized looks.
Simple Dotting Patterns for Beginners
For absolute beginners, starting with simple dotting patterns is a fantastic way to get acquainted with the technique. A classic approach is creating a row of evenly spaced dots across the nail. You can then vary the spacing or use different colors to create a more dynamic effect. Experiment with different dot sizes and densities to discover what works best for you. These simple patterns are a great way to build confidence and develop your hand-eye coordination.
Another straightforward option involves creating a cluster of dots in the center of the nail, slightly offset, for a more focused design. This approach is easier to master than more complex patterns and allows you to practice the subtle movements needed for precise application. Experiment with colors to create a visual focal point, adding a splash of color to your nails.
Using Dotting Tools for Accents
Dotting tools aren't limited to simple patterns. They are excellent for adding accents to existing designs. Imagine adding a few carefully placed dots to a gradient manicure or using them to create tiny flower embellishments on a plain French manicure. Dotting tools allow you to add detail and personality to your nail art, turning a basic design into something truly unique.
Adding dots as accents to already decorated nails can make a significant difference in the overall aesthetic. A few strategically placed dots can transform a simple design into a striking and personalized look. The dots can be used to highlight specific areas, creating a focal point and adding a touch of sophistication. Experiment with different colors and patterns to see how dots can enhance your existing nail art designs.
Dotting Tools and Nail Polish Combinations
The beauty of dotting tools lies in their ability to combine with different nail polish colors to create a vast array of effects. Experimenting with different shades, from bold and bright to subtle and pastel, allows you to customize your nail art to match your personal style. Combining various colors and using multiple shades can create stunning visual effects and bring your creativity to life.
Consider using a base coat of a neutral color before applying your chosen nail polish colors with dotting tools. This creates a clean, smooth surface for the dots and prevents any smudging or bleeding. Explore different color combinations – from complementary colors to contrasting shades – to discover your favorite looks and experiment with different textures and finishes to create a truly unique and personalized design.
Blood flow is essential for delivering oxygen and nutrients to tissues throughout the body. It is driven by the heart's pumping action and influenced by the resistance in blood vessels. Factors such as vessel diameter and blood viscosity can greatly affect how efficiently blood flows.
Simple Nail Art with Stickers: A Quick & Easy Option
Choosing the Right Stickers
Selecting the perfect nail stickers is crucial for a successful design. Consider the overall aesthetic you're aiming for. Are you going for a minimalist look, a bold statement, or something in between? Different sticker sheets offer various designs, from delicate florals to geometric patterns, and even shimmering holographic effects. Think about your wardrobe and accessories to coordinate your nail art. Selecting stickers that complement your style will elevate your look.
Don't be afraid to experiment! Try different themes and styles to discover your favorites. Look for sticker sheets with high-quality, durable stickers that adhere well and resist chipping or peeling. This will ensure your nail art lasts longer, saving you time and effort.
Preparing Your Nails
Proper nail preparation is key for any nail art, including sticker application. Start by cleaning your nails thoroughly with a nail brush and remover to eliminate any dirt or residue. This ensures the stickers adhere properly and prevents them from lifting or coming loose prematurely. A clean surface also allows for a smoother, more polished look.
Next, push back your cuticles and trim your nails to your desired shape. A well-maintained nail bed will provide a more even and attractive surface for the stickers. Remember to use cuticle oil to moisturize your cuticles and keep them healthy.
Applying the Stickers
Once your nails are prepped and ready, carefully remove a sticker from the sheet. Avoid touching the adhesive side to prevent smudging or fingerprints. Position the sticker precisely on your nail, ensuring it's centered and aligned with the nail's shape. Use a small tool or even a toothpick to gently press the sticker into place. Work slowly and methodically to achieve even coverage and avoid air bubbles.
If you notice any wrinkles or bubbles after applying the sticker, use a toothpick or a small tool to gently push them out. Be cautious not to damage the sticker during this process.
Adding a Finishing Touch
After applying all the stickers, add a top coat to seal the design and protect it from chipping. This step is essential for maintaining the integrity of your nail art and prolonging its longevity. A clear top coat will also enhance the shine and overall appearance of your design.
You can also add a touch of extra sparkle or color by using nail polish or glitter. Experiment with different techniques and styles to create a unique and personalized look. If you want a more vibrant color, you can also apply a base coat and a top coat of nail polish on top of the stickers.
Tips for Beginners
For beginners, practice makes perfect. Start with simple designs and gradually work your way up to more intricate ones. Don't be afraid to experiment with different colors and patterns. Nail stickers are an excellent way to explore your creativity and express your personality through your nails.
Use a cuticle pusher to gently push back your cuticles. This will expose the natural nail and prevent the stickers from lifting.
Troubleshooting Common Issues
Sometimes, stickers might not adhere as intended. If you encounter this issue, try applying a thin layer of nail glue underneath the sticker for extra hold. If the sticker is already applied, use a small tool to gently remove the sticker and reapply it. If the sticker is lifting, gently press it back down to secure it again.
Another common problem is air bubbles under the stickers. A small tool, like a toothpick, is often helpful to carefully push out any air pockets, ensuring a smooth, bubble-free finish.
Maintaining Your Nail Art
To ensure your nail art with stickers lasts longer, avoid harsh chemicals that could damage the stickers. Additionally, practice proper nail care by moisturizing your nails and cuticles regularly. Avoid picking or scratching at your nail art, as this could cause damage.
If you find that the stickers are starting to lift or chip, you can gently remove them and reapply them with fresh stickers. This will help maintain the attractive appearance of your nails.
Adding a Touch of Sparkle with Glitter & Shimmer
Glitter & Shimmer for a Subtle Sparkle
Adding a touch of glitter or shimmer to your nails is a fantastic way to elevate a simple manicure. A subtle application of glitter polish or a few strategically placed glitter accents can add a touch of glamor without overwhelming the design. Experiment with different glitter shades to find the perfect match for your style. Whether it's a soft rose gold or a vibrant turquoise, glitter adds a touch of magic to any nail look.
For a beginner-friendly approach, try applying a clear top coat over a base coat and then sprinkling glitter directly onto the nail. This creates a simple, yet elegant effect. Alternatively, use a glitter glue to adhere glitter to the nail, creating a more defined and lasting design.
Creating a Festive Sparkle
Glitter and shimmer are perfect for creating festive nail art. For the holidays, consider a red base coat with gold or silver glitter accents. This classic combination is always a winner. You can also try different shades of glitter to create a unique look, incorporating different colors and textures for a vibrant effect.
Consider using a metallic base coat as a foundation for a festive look. Combining this base with a mix of glittery accents in varying tones creates a sparkling and eye-catching design.
Adding Sparkle to a Solid Color
A solid color manicure can be instantly elevated with the addition of glitter. Applying a single coat of your favorite color, and then adding a few strategically placed glitter accents, is a simple yet effective way to add visual interest. Consider using different shades of glitter to create a gradient effect. For example, using a light-to-dark glitter transition across the nail gives a beautiful and dynamic look.
Shimmer for a Sophisticated Look
Shimmer polishes offer a subtle, yet sophisticated touch to your nails. Their delicate sparkle adds a touch of elegance without being overly flashy. A smooth shimmer application creates a sleek and modern look, perfect for everyday wear.
For a more dramatic effect, use a shimmery top coat or a shimmery base coat. This technique creates a beautiful, almost iridescent effect, offering a touch of magic to your nail design.
Glitter Accents for a Touch of Personality
Glitter accents allow for a personalized touch to your nail art. Experiment with different shapes and sizes of glitter to create unique designs. A single accent of glitter on the nail tip or a few strategically placed glitter dots can create a personalized and unique design.
Consider incorporating glitter into other nail art elements. For example, use glitter to embellish a floral design or incorporate it into a geometric pattern. This technique allows you to combine different design elements and create a truly unique and personalized look.
Glitter Gradient Designs
Creating a glitter gradient is a great way to add visual interest and dimension to your nails. Start with a base coat and then transition from one shade of glitter to another, creating a smooth gradient effect across the nail. This creates a mesmerizing and artistic touch to your design.
Using different glitter sizes and textures in the gradient can add a unique dimension to your design. A combination of fine glitter and chunky glitter can create a textured and layered look, offering a unique and eye-catching design.
Tips for Applying Glitter & Shimmer
For the best results, apply a thin layer of base coat before applying glitter or shimmer polish. This ensures that the glitter or shimmer adheres properly and prevents it from clumping or smudging. Using a top coat over the glitter or shimmer helps to seal the design and prevent it from chipping or wearing off prematurely.
Don't be afraid to experiment with different techniques and designs. Glitter and shimmer are a fun and versatile way to personalize your nails. Have fun and let your creativity shine!
Read more about Easy Nail Art Designs for Beginners


![Review: [Specific Sock Brand] Comfort and Durability](/static/images/29/2025-05/Durability3APuttingThemtotheTest.jpg)
![Best SPF for Face: Protecting Your Skin Daily [2025]](/static/images/29/2025-05/BeyondSPF3ASupportingHealthySkinHabits.jpg)


Hot Recommendations
- Grooming Tips for Your Bag and Wallet
- Best Base Coats for Nail Longevity
- How to Treat Perioral Dermatitis Naturally
- How to Use Hair Rollers for Volume
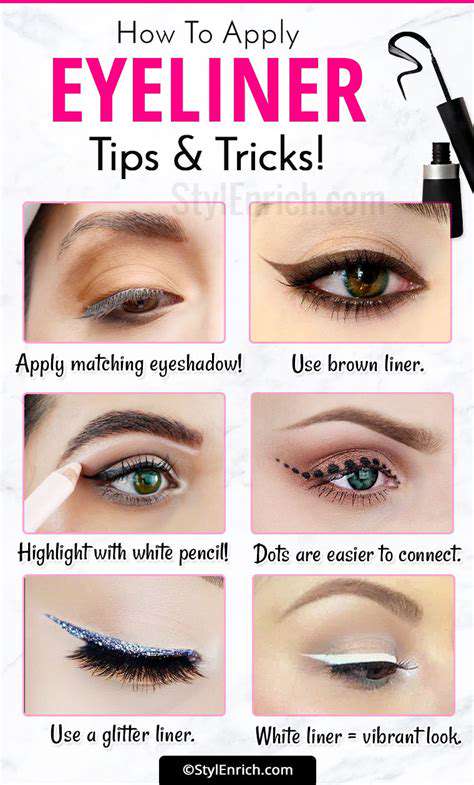
- How to Do a Graphic Eyeliner Look
- Best DIY Face Masks for Oily Skin
- Guide to Styling 4C Hair
- Guide to Improving Your Active Listening Skills
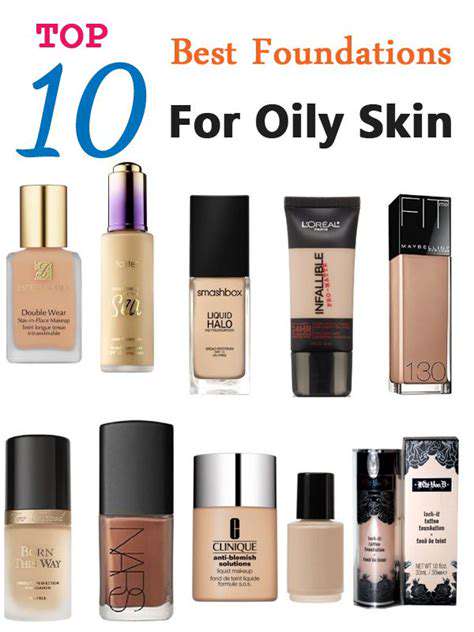
- How to Fix Cakey Foundation
- Best Eye Creams for Wrinkles